Basics of Winter Gardening
Just because Thanksgiving has just passed and the calendar is quickly leading on towards Christmas and New Year’s Eve, we don’t have to resort to going to the grocery store for some of our favorite foods. With a little bit of planning before the last of the warm-weather crops are coming out of the ground, these 5 cold-hardy vegetables can be planted before the soil cools and harvested straight through until spring.
Leeks
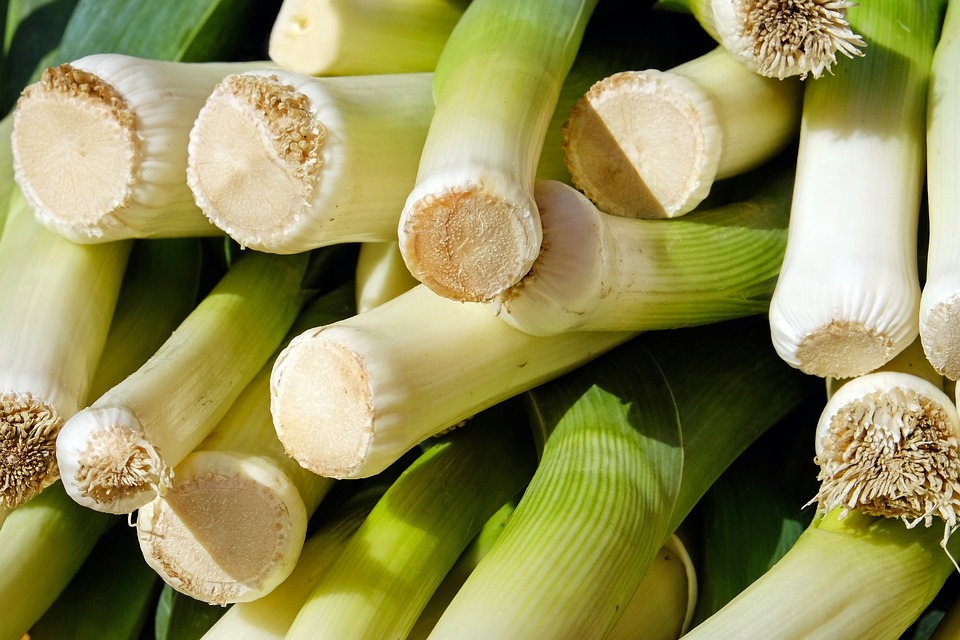
In order to have harvests of leeks in the wintertime, you are going to want to start the seeds in your favorite seed starting medium 10 to 12 weeks before your last frost date. Though this seems like a long time, leeks are slow growers and it will take them that long to germinate and get strong enough to withstand the conditions they are about to endure.
As your warm weather crops start dying off and getting hauled off to the compost pile, dig some finished compost and a few handfuls of time released fertilizer into the bed. This is an important step because it will add new nutrients to the soil for the leeks to feed off of while it’s too cold to water them.
Transplant your leeks immediately into the freshly disturbed soil by poking holes two to three inches deep, with two to three inches of spacing between each one. Drop a leak in each hole and fill the soil back in around it, and water the patch in well with a balanced fertilizer when planting is done to give them a running start.
To protect your leeks from the coming freezes, mulch a three to four-inch layer of mulch in the bed. If the temperatures threaten to drop below 0 degrees Fahrenheit, or it’s threatening to snow more than three to four inches, completely cover your leeks with lightweight mulch like straw or leaves. This will serve as both insulation and protection for your plants until the conditions are more favorable.
Now you can harvest them anytime you want. all winter long. If there are any left in the ground when it starts to thaw, pull them before they start to go to seed and they will keep for quite a while.
Cabbages
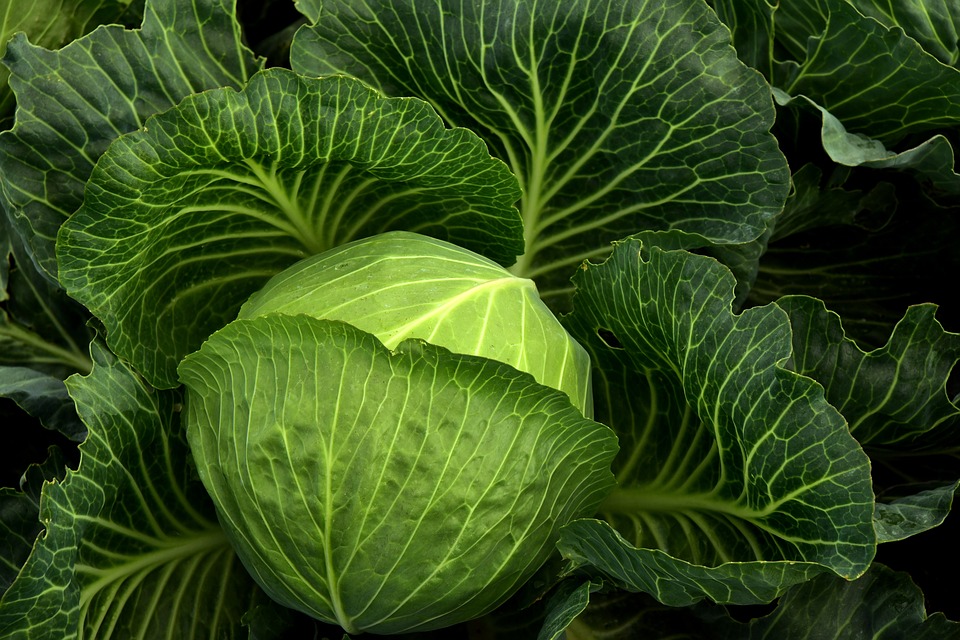
To grow your cabbages through the Winter, start your seeds around eight weeks before your last frost date. As the season ends on one of your warm weather crops, and they get taken out of the garden, dig a few shovels full of compost, and a time released fertilizer that is high in nitrogen into the bed to prepare it for your cabbages.
Plant one cabbage per square foot by digging a hole large enough for the root ball to fit in, and filling back in around them after you’ve placed them into the hole. Tamp the soil tightly around the roots of the cabbage plants and water them in well with a liquid fertilizer.
To protect your cabbages from the temperature drop, mulch a heavy layer of mulch around the plants at planting time. When sub-zero temperatures or threats of heavy snowfall are being called for, use stakes and some twine or zip ties to build tepee structures over each plant. Wrap the tepees with thick plastic or fabric for protection.
Growing cabbage through the winter like this will not produce you very large heads of cabbage to harvest, but by using cut and come again harvesting methods, you will be able to harvest cabbage leaves from the plant through the winter and already have established plants in the ground when the Spring decides to thaw it out for you.
Chard
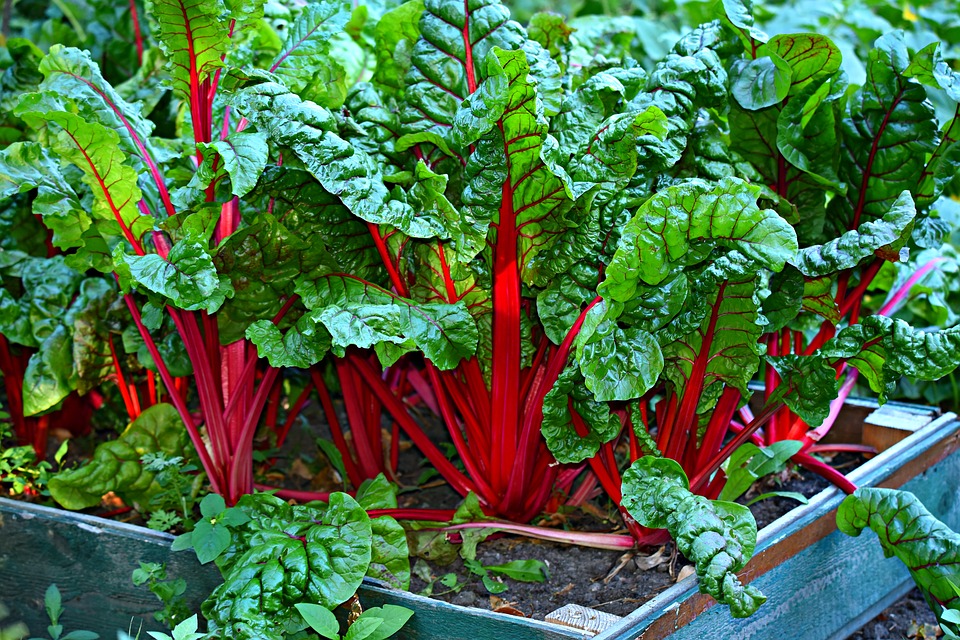
Amend the spot where you are planning on planting your chard with compost, and a nitrogen heavy, time released fertilizer.
Plant your chard seeds directly into the ground about 10 to 12 weeks before your last frost date by digging furrows a half of an inch deep. Then space your seeds about three to four inches apart, or about nine per square foot, into the furrow and replace the soil. Tamp it down well over the seeds and water them in.
Since chard seeds are actually a cluster of seeds you will need to thin the seedlings back out to three or four inches apart after they break through the soil. After the extra seedlings have been removed, sprinkle a fine layer of balanced, granulated fertilizer around your remaining plants. Be careful not to get too much on your plants or it will burn them.
Mulch a three or four inch layer of mulch around your chard as soon as it reaches five to six inches tall, and keep it well watered and fertilized until frosts start to set in.
When heavy freeze or snow is on the way, the easiest solution to protect your chard is to cover it with a cloche. A homemade cloche can be made easily by cutting the bottom out of a two or three liter bottle and sitting it right over your plants, and it’s plenty good enough protection to keep them until the following Spring.
Kale
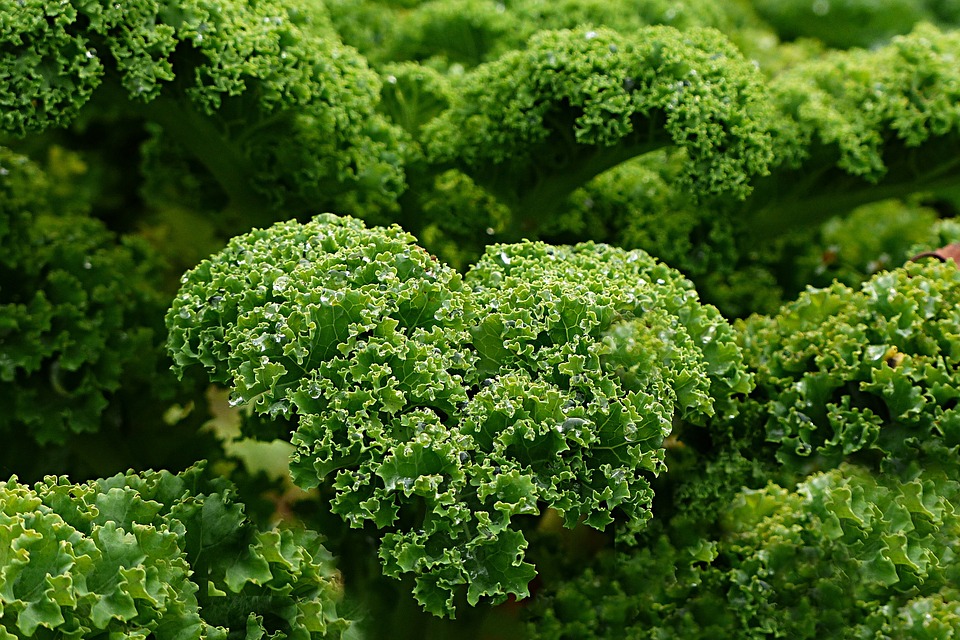
Start your kale in starter pots, or a tray about six to eight weeks before your average first frost date. Keep their soil temperature below 75 degrees Fahrenheit for best results.
Use compost and nitrogen rich granulated fertilizer to prepare your soil within a week of your first frost date, and begin planting. Space your kale 12 inches apart, or four per square foot, by digging holes big enough for the root balls of the plants. Then lower the roots into the hole and firmly pack the soil back in around them and watering them in. Mulch heavily right up the stalks of the kale plants, but not covering the leaves.
When the sub-zero temperatures and snow come in, cover your kale with a cloche or inverted planter or bucket and it will stay protected.
Parsnips
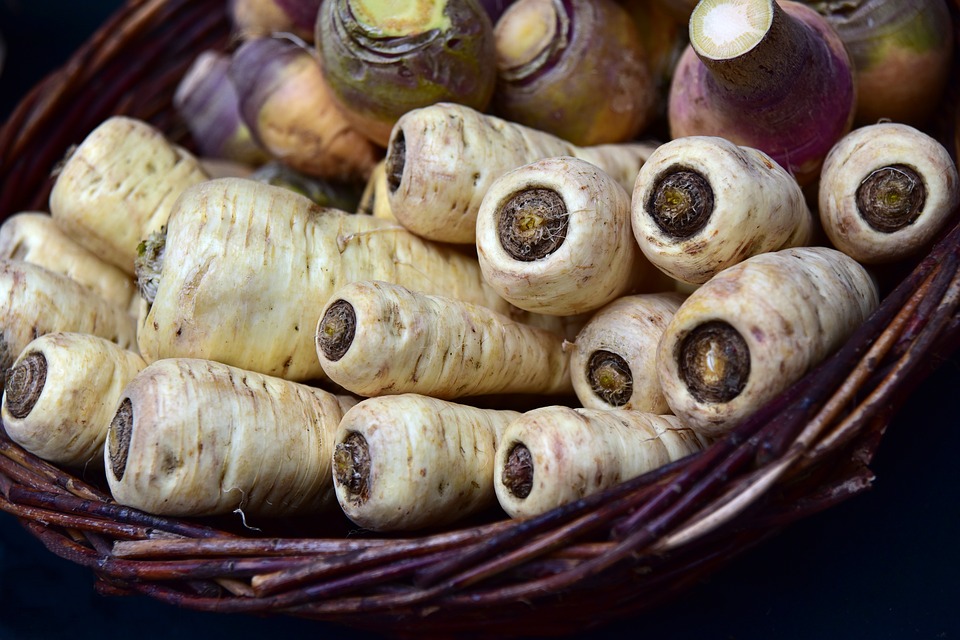
In order for you to be harvesting parsnips in the Winter, you’re going to have to direct sow them around July. Parsnips take 130 to 180 days to reach full maturity, and actually get sweeter after they have been exposed to a freeze.
To prepare your soil for parsnips, dig them a bed 12 inches deep and amend the soil with compost and a granulated fertilizer that is heavy in phosphorous and potassium. Make sure the soil is really loose and crumbly so the roots can push their way through it easily.
Parsnips should be planted about a half of an inch deep in drills, or planting holes. Space the seeds out to about two to three inches between, or nine per square foot, and cover them over with soil and lightly tamp it down. Water them in well.
Keep your parsnip patch watered and fertilized with a balanced liquid fertilizer until cold weather kills the tops off. Cover the patch over with a board or piece of plywood and don’t water it anymore. Just come out and pick parsnips whenever you want until spring.